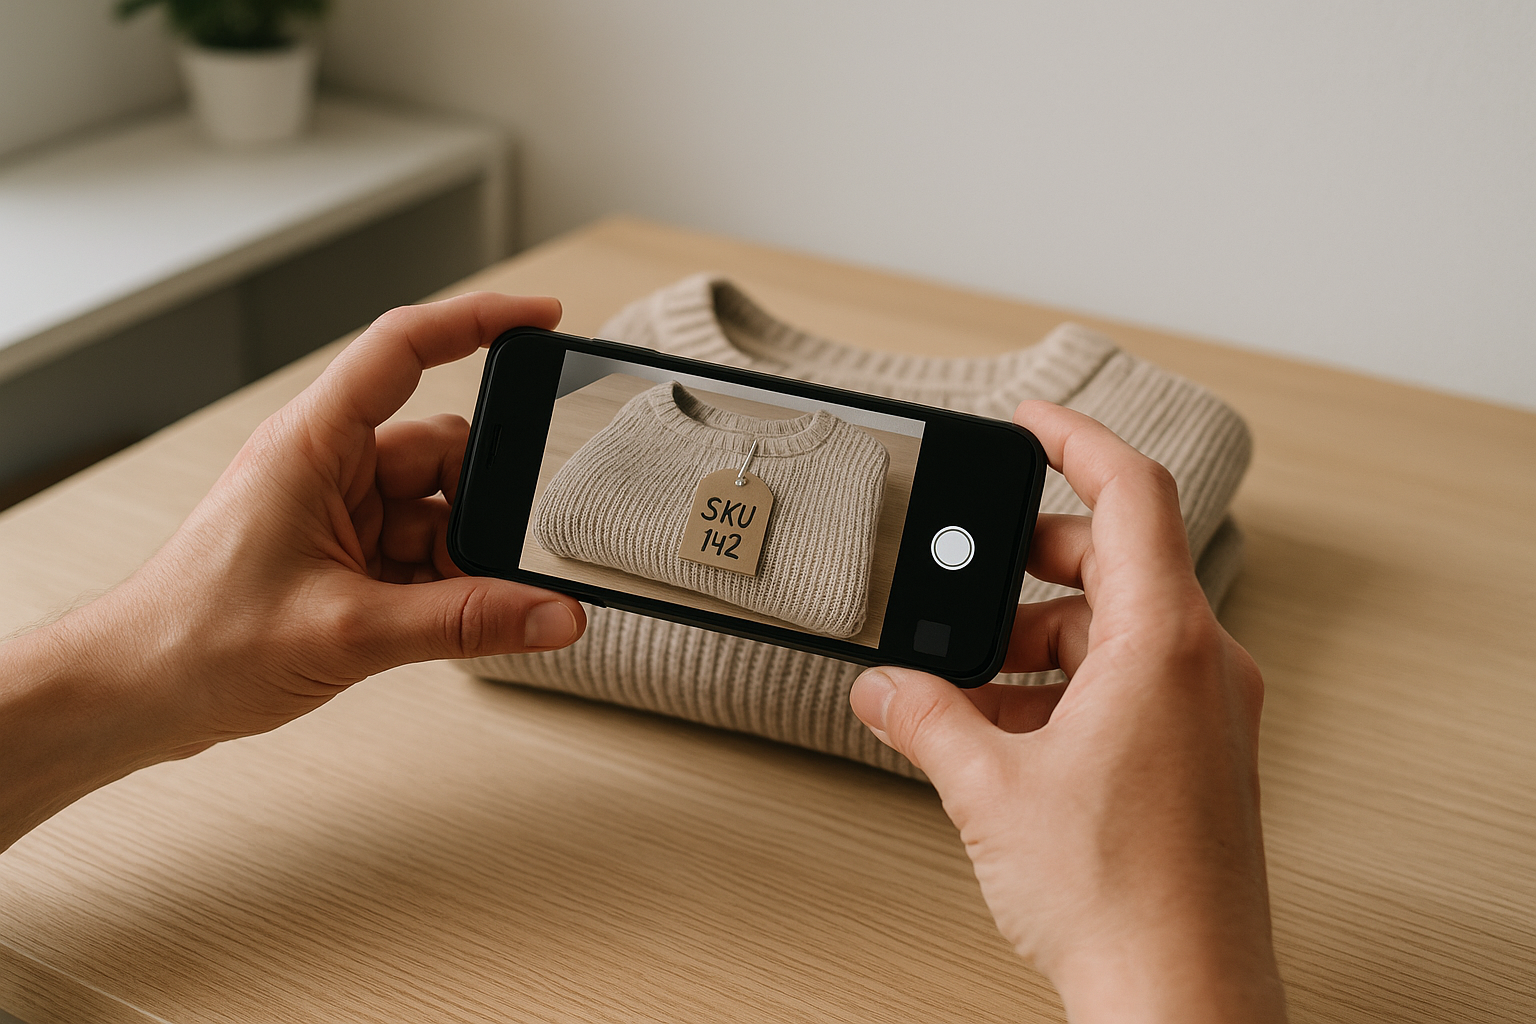
The Intake Photo System: Why One Shot Before Storage Stops Missing Items
An intake photo system means photographing every item once, immediately after sourcing and before it goes into a bin, with its SKU visible in frame. That single habit — done before storage, not after listing — is what stops items from going missing between sourcing and shipping, and it gives you a timestamped condition record before wear, wrinkling, or a mixed-up bin can change the story.
Most resellers photograph inventory for the listing. Front, back, tag, defects — the shots that sell the item. Almost nobody photographs inventory for the system. That gap is where items disappear: a top gets bagged with the wrong SKU, a jacket sits in an unlabeled overflow bin for six weeks, a buyer disputes the condition and you have nothing dated before the sale to compare against. None of that is a listing problem. It's an intake problem, and it shows up 200 items later as shrinkage you can't explain.
The failure mode: items don't get lost, they get unrecorded
"Lost inventory" is almost never a physical mystery. The item is usually still in the house — in the wrong bin, under a different bag, mixed into a batch that got relabeled. What's actually lost is the record: the connection between a physical garment and its SKU, at the moment it entered your system.
Here's the pattern we see across small operations doing 100–500 items a month:
- A batch of 40 items comes in from a Saturday thrift run. They get bagged in bulk, tagged later that night or the next day.
- Between sourcing and tagging, two items get set aside — one for a stain check, one because the scale was busy — and never make it back into the batch.
- Three weeks later, a listing goes live for an item that's actually still sitting in a random bag on the shelf, un-SKU'd.
- The seller spends 20 minutes searching bins that should take two.
Multiply that 20 minutes by even a modest miss rate — say 1 in 150 items — and at 400 items a month you're losing over two and a half hours to searching, plus the sale itself if the item can't be found before the listing goes stale or a buyer walks.
What one photo at intake actually fixes
The intake photo is not a listing photo. It doesn't need good lighting or a flatlay. It needs three things in frame: the garment, the SKU (written on a slip of paper, a hang tag, or a label maker sticker), and enough of the garment to identify it later without opening a bin. That's it. Taken on your phone, dumped into a folder named by date or batch, it becomes your ground truth.
What that one shot buys you:
- A searchable record independent of physical storage. If a SKU goes missing from a bin, you scroll the intake folder instead of opening every bin in the room.
- A timestamp on condition, before storage and before listing. If a buyer disputes condition weeks later, you have a dated reference point that predates your own handling, your storage method, and any shelf wear.
- A checkpoint for batch reconciliation. Count intake photos against physical count against listed count. Three numbers that should always match — and when they don't, you know exactly where the gap opened.
- A defect baseline. If you graded the item at intake — noting a pull in the knit or a loose button — you can confirm later whether that defect existed before it went into storage or happened on your watch.
The step-by-step intake process
This is the exact sequence we recommend running the moment an item is sourced, before it touches a storage bin:
- Assign the SKU immediately — at the sourcing point if possible, or within the same session, never "later tonight."
- Write or print the SKU on a slip, tag, or sticker and place it directly on or pinned to the garment.
- Lay the garment flat or hang it, with the SKU slip visible in the same frame.
- Take one photo. No styling, no second angle — just enough detail to identify the garment and confirm its condition tier at a glance (NWT, NWOT, Excellent, Very Good, Good, Fair, or Poor).
- Save the photo into a folder or system tied to that SKU before the item leaves your hands.
- Only then move the item into its storage bin or rack location.
- At the end of the session, count intake photos against physical items sourced that day. Any mismatch gets resolved before you move to the next batch.
[Screenshot placeholder: FlipDesk intake screen showing SKU entry, camera capture, and auto-timestamp before the item is assigned a bin location.]
What to capture in the shot — and what you don't need to
Resellers often over-invest in intake photography, treating it like listing photography, or under-invest and end up with a blurry shot that's useless six weeks later. Here's the line we draw:
| Element | Needed at intake | Save for listing |
|---|---|---|
| SKU visible in frame | Yes — non-negotiable | — |
| Full garment visible (front) | Yes | Yes, better lighting |
| Back, side, detail angles | No | Yes |
| Flatlay or on-form styling | No — flat and fast | Yes |
| Obvious defect noted in frame or caption | Yes, if visible at intake | Yes, in gallery |
| Studio lighting | No | Yes |
| Tag/brand label shot | Optional, helpful for authentication | Yes |
The intake shot should take under 15 seconds per item. If it's taking longer, you're doing listing photography twice.
Where this connects to grading and returns
An intake photo is only half the value if it doesn't capture condition, not just identity. If you note the condition tier at intake — Very Good with light pilling on the cuffs, say, versus Good with a small stain near the hem — you now have a documented baseline that sits before any storage handling, shipping, or buyer claims.
This matters most in disputes. A buyer who claims an item arrived with a stain that wasn't disclosed is making a claim about a point in time. Your intake photo, dated weeks before the sale, is evidence about a different point in time — and if the stain isn't visible in it, that's a materially different story than if it is. The same logic applies across all five grading factors we track at GradeThread — Fabric Condition, Structural Integrity, Cosmetic Appearance, Functional Elements, and Odor & Cleanliness — because a documented baseline on any one of them can settle a dispute before it becomes a return.
Sellers who skip this step often find themselves arguing condition after the fact with nothing but memory. Sellers who photograph at intake are arguing with a timestamp.
Common mistakes that undo the system
- Batching photos at the end of the day. By the time you get to item 30, garments have been shuffled, and matching photo to physical item becomes guesswork. Photograph as you go, not in a end-of-session sprint.
- No SKU in the frame. A photo of a sweater with no identifying marker is just a photo of a sweater. It doesn't solve anything.
- Storing photos separately from your inventory system. If the intake photo lives in your camera roll and your SKU list lives in a spreadsheet, you've built two systems that don't talk to each other. The photo needs to be attached to the SKU record, not floating nearby.
- Treating intake photography as optional for "obviously fine" items. The items that go missing are rarely the ones you were worried about. They're the routine ones nobody thought needed a record.
The throughput math
At 15 seconds per item, 300 items a month costs you roughly 75 minutes of intake photography — under an hour and a half. Compare that to the time lost searching for a single misplaced SKU (10–20 minutes, conservatively) or the cost of a lost item entirely (full COGS plus the time already sunk sourcing and tagging it). One missing $18 item, found two hours late or not at all, costs more than a month of intake photos combined.
The math isn't close. Intake photography is one of the few reseller habits where the time cost is nearly flat and the downside it prevents scales with your volume.
Try it on your next batch
FlipDesk's intake workflow ties the photo, the SKU, and the condition note into one step before the item ever reaches a bin — so your inventory record and your physical inventory stay in sync as you scale past a spreadsheet. Run your next sourcing haul through it and see how many minutes of searching you get back.