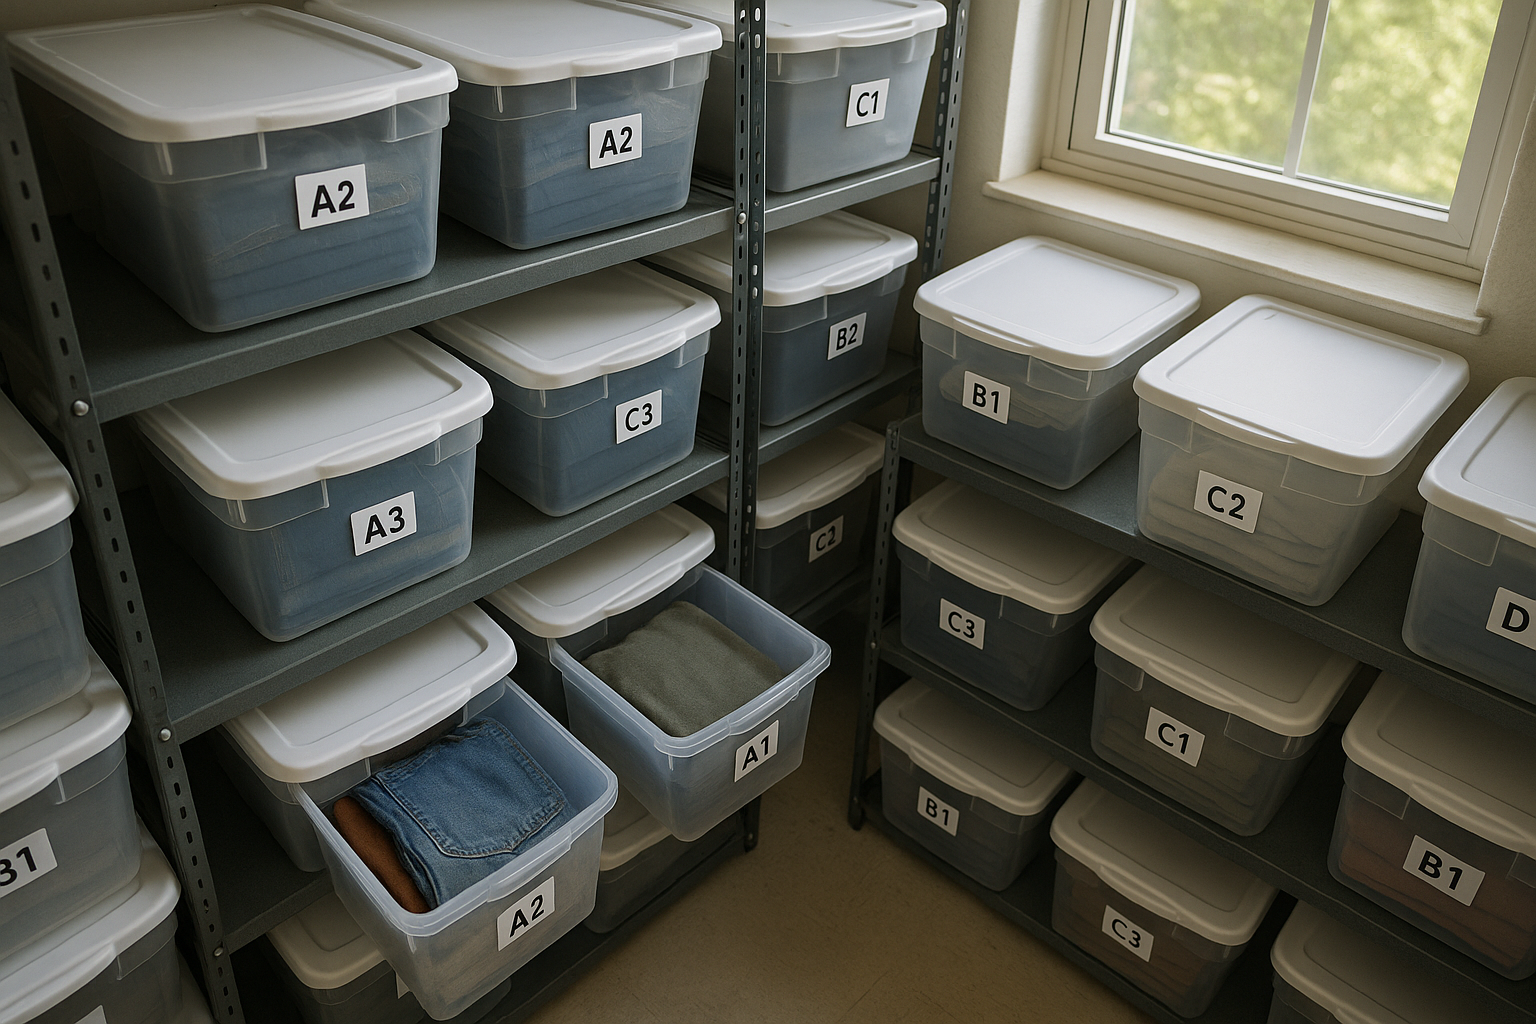
Reseller inventory storage that actually works has three parts: a physical bin system with unique location codes, a digital map that links each SKU to a bin, and an intake photo taken the moment an item is shelved. Skip any one of the three and you will eventually sell something you cannot find in under two minutes.
Most resellers do not lose inventory to theft or damage. They lose it to their own storage. An item gets pulled for a photo reshoot and set on the wrong shelf. A bin gets relabeled after a garage reorg and the spreadsheet never gets updated. A sale comes in on a Tuesday night and the seller spends twenty minutes at 11 p.m. digging through totes that all look the same. None of that shows up on a P&L line item, but it shows up in late-shipment defects, canceled orders, and the slow bleed of an hour a day spent searching instead of listing.
Why "findable" is a throughput number, not a tidiness preference
Pick time is the metric that matters. If it takes you 90 seconds on average to locate a sold item and pull it for shipping, at 40 orders a day that is one hour. If it takes you 8 minutes because your bins are unlabeled or your spreadsheet is stale, the same 40 orders cost you over five hours. That gap is not a tidiness issue — it is the difference between shipping same-day and eating a late-shipment strike from eBay's defect rate calculation.
Organize reselling inventory the way a warehouse organizes a pick face: every item has one home, every home has one code, and every code lives in a system you can search in under five seconds. Below is the exact setup.
Setting up a reseller bin system: step by step
- Choose a container size that matches your smallest common category — shoe-box size works for folded tops and accessories, larger totes for denim and outerwear, a hanging rail for anything that sells better unwrinkled.
- Assign each container a permanent alphanumeric location code, such as A1, A2, B1, using a simple grid (aisle-shelf-bin), not a description like "blue tote by the door."
- Print and affix the location code to both ends of the bin or shelf so it is visible from either direction you approach it.
- Create a SKU for every item at intake — a short code such as the year, a category letter, and a sequential number, for example 26D0143 for the 143rd denim item logged in 2026.
- Log the SKU-to-location pairing in your tracking system the moment the item is shelved, not at end of day when you have forgotten which bin you used.
- Photograph the item at intake, including the label and any flaw, and save that photo under the same SKU so the condition record and the location record are tied to one identifier.
- Print the SKU on a small tag or hangtag and attach it to the garment itself, so the physical item and the digital record can be matched even if it gets moved.
- When an item sells, pull it, verify the SKU tag matches the order, and immediately clear or update its location field so the next person (including future you) does not go looking for it in a bin it already left.
The step most sellers skip is step five — logging location at the moment of shelving. It takes fifteen seconds and it is the single highest-leverage habit in reseller inventory storage. Do it in a batch at the end of a sourcing trip and you will lose the thread on at least a few items.
Mapping SKU to location: the digital half of the system
A bin system without a location field in your tracking tool is just a labeled mess. Inventory location tracking only works if the SKU record carries a location value that updates in real time, not a static note from intake day.
At minimum, your SKU record needs:
- SKU — the unique identifier, printed on the item and the listing's custom label field.
- Current location — the bin or shelf code, updated whenever the item physically moves.
- Status — sourced, listed, sold, pending ship, shipped.
- Condition grade — the tier (NWT, NWOT, Excellent, Very Good, Good, Fair, Poor) assigned at intake, so a picker pulling for shipment can sanity-check the item against what was promised in the listing.
- Intake photo link — the reference image taken the day the item entered inventory.
This is where a spreadsheet starts to strain past a few hundred SKUs. A single missed update — someone moves a tote during a shelf reorganization and forgets to change the location column — breaks the whole chain, and you are back to physically searching bin by bin. FlipDesk's inventory module ties the SKU, location, status, and condition grade to one record that updates automatically as an item moves through sourcing, listing, sale, and shipment, so the location field is never more stale than your last scan.
Photographing intake so nothing gets lost between "sold" and "ship"
The riskiest gap in reseller inventory storage is not sourcing to listing — it is sold to shipped. An item sells, someone has to find it, and if the pull takes too long you are staring down an eBay late-shipment defect or a Poshmark cancellation for a sale you already earned.
Intake photography closes this gap two ways. First, the reference photo lets whoever is pulling the item confirm they have the right garment before it leaves the shelf — critical when two black crewneck sweaters share a bin. Second, it gives you a documented condition record you can point to if a buyer opens a not-as-described case after the item ships. A photo taken at intake, tied to the grade you assigned across Fabric Condition, Structural Integrity, Cosmetic Appearance, Functional Elements, and Odor & Cleanliness, is the difference between a five-minute resolved case and a lost dispute.
Practical intake photo rules:
- Shoot the front, back, tag/label, and any flaw the same day the item is logged — not after it is listed.
- Name or tag the photo file with the SKU, never a generic filename like IMG_4021.
- Store the photo where it is retrievable from the SKU record, not buried in a phone's camera roll.
- If you use GradeThread to generate a condition grade and certificate, attach that certificate to the same SKU record so the grade, the photo, and the location are all one lookup.
Barcode and QR scanning: when it earns its keep
Printed alphanumeric codes work fine by eye up to a few hundred SKUs, but at higher volume typing a location code into a search box is slower than scanning it. A basic QR or barcode workflow — a code printed on the bin and a matching code on the SKU tag — lets you confirm a pull with a phone camera instead of squinting at a shelf label in bad lighting. You do not need dedicated scanner hardware to start: any smartphone camera paired with a tracking tool that supports scan-to-update will cut a few seconds off every single pull, and a few seconds times 40–2000 orders a month adds up fast. Reserve dedicated barcode guns for the point you are running a multi-zone facility with a pick/pack station, where the volume justifies the hardware cost.
Storage systems by inventory volume
What works at 40 items does not work at 400. Here is a rough guide to match your storage setup to your throughput.
| Volume | Storage setup | Location codes | Target pick time |
|---|---|---|---|
| Under 100 items | Labeled totes or a single closet rail | Simple letter-number (A1, A2) | Under 2 minutes |
| 100–500 items | Shelving with numbered bins, hanging rail by category | Aisle-shelf-bin (A-3-1) | Under 90 seconds |
| 500–1,500 items | Warehouse racking or storage unit with zones | Zone-aisle-shelf-bin | Under 60 seconds |
| 1,500+ items | Multi-zone facility, dedicated pick/pack station | Zone-aisle-shelf-bin with barcode scan | Under 45 seconds with a scanner |
Notice the trend: as volume grows, the location code gets more specific and the tracking system has to do more of the lookup work automatically. A spreadsheet can carry you through the first two tiers. Past 500 items, manual updates start slipping and that is usually the point resellers ask when they should stop using spreadsheets altogether — see our full breakdown on when to graduate from spreadsheets for the specific signs.
Common mistakes that break the system after month one
- Batching location updates instead of logging in real time. Waiting until end of day to log where ten items landed guarantees at least one gets mismatched.
- Reusing a location code after clearing a bin without checking for stale SKU records. If the old SKU still points to that code, you will pull the wrong item.
- Letting seasonal reorganizations skip the relabel step. Moving denim to a bigger bin for fall restock is fine — moving it without updating every affected SKU record is how you lose a shelf's worth of items at once.
- Storing the intake photo somewhere the SKU record does not link to. A photo on a phone that never makes it into the tracking system is not a record, it is a coincidence.
The habit that makes the whole system hold
None of this works without one discipline: update the location field the moment the item moves, every time, no exceptions. The bin system, the SKU map, and the intake photo are all just infrastructure. The habit of logging the move in real time is what keeps that infrastructure honest six months in, when you have sourced another 800 items and forgotten which shelf held what.
If you are still tracking location in a notes app or a spreadsheet tab that only gets updated on slow days, that is the leak. It costs you pick time today and it costs you a late-shipment strike the day you cannot find a sold item before the carrier cutoff.
Try it on one shelf first
You do not need to rebuild your whole storage setup this weekend. Pick one shelf or one tote of 20–30 items, assign it a location code, log the SKU-to-location pairing, and photograph each item at intake. Run it for two weeks and time your pulls. If pick time drops, roll the system out to the rest of your inventory. FlipDesk's inventory module can hold the SKU, location, status, and condition grade in one record from day one, so the system scales with you instead of becoming the next spreadsheet you have to abandon.