The Defect Photo Checklist: What Buyers Actually Need to See Before They Hit 'Buy It Now'
What defects to photograph in an eBay clothing listing: any stain, hole, pilling patch, fabric thinning, loose stitching, broken zipper or button, stretched cuff, and odor-causing area (even though you can't photograph a smell, you can photograph its source, like a yellowed pit stain). If a defect affects any of the five grading factors — Fabric Condition, Structural Integrity, Cosmetic Appearance, Functional Elements, or Odor & Cleanliness — it needs its own close-up shot, not a mention buried in the description.
We've said this before in different words: the return you prevent with a photo costs you 30 seconds. The return you eat because you didn't take that photo costs you the item, the shipping both ways, and a dent in your account health metrics. Defect photography isn't optional detail work. It's the cheapest insurance policy in your listing workflow.
Why defect photos matter more than your fifth flatlay angle
Most sellers over-invest in the photos that make the item look good and under-invest in the photos that make the condition claim defensible. You end up with eight beautiful flatlay angles and zero close-ups of the pilling under the arm that the buyer notices the second they unbag it.
Here's the mechanic that matters: eBay's Money Back Guarantee sides with buyers by default on "item not as described" claims unless you have documentation that contradicts them. A written condition note ("minor pilling") is your word. A timestamped, well-lit close-up of that exact pilling patch, taken before you shipped, is evidence. One wins disputes. The other doesn't.
We've covered how to defend a disputed return and how description wording reduces returns in past posts. This one is about the photo half of that equation — the part buyers actually look at first.
The defect photo checklist: what to shoot, in order
Run this checklist on every item before it goes into a listing. It maps to the same five factors GradeThread uses to grade condition, so if you're already thinking in those terms, this will feel familiar.
- Inspect the garment under bright, even light (daylight near a window or two softbox lights, not one overhead bulb) and flag every visible issue before you pick up the camera.
- Shoot the overall front and back first, on a form or flatlay, so the buyer has context for where each defect sits on the garment.
- Photograph every Fabric Condition issue up close: pilling, thinning, fading, sun-bleaching, or fabric that's gone thin and see-through. Hold the camera 4-6 inches from the fabric.
- Photograph every Structural Integrity issue: open seams, popped stitches, holes, fraying at cuffs or hems, and any repair (patch, re-stitch, darn) whether you made it or found it already there.
- Photograph every Cosmetic Appearance mark: stains, discoloration, ink, makeup transfer, deodorant marks, or print/logo cracking. Shoot straight-on with the flash off to avoid glare hiding the mark.
- Photograph every Functional Elements issue: a broken zipper pull, a missing button, dead elastic in a waistband, a snap that won't catch. If it's a working part, show it in both the working and non-working position if possible.
- For Odor & Cleanliness, you can't photograph a smell, but photograph the visual evidence when there is any — yellowing at pit stains, a deodorant buildup line, or discoloration from storage. Note the rest in writing.
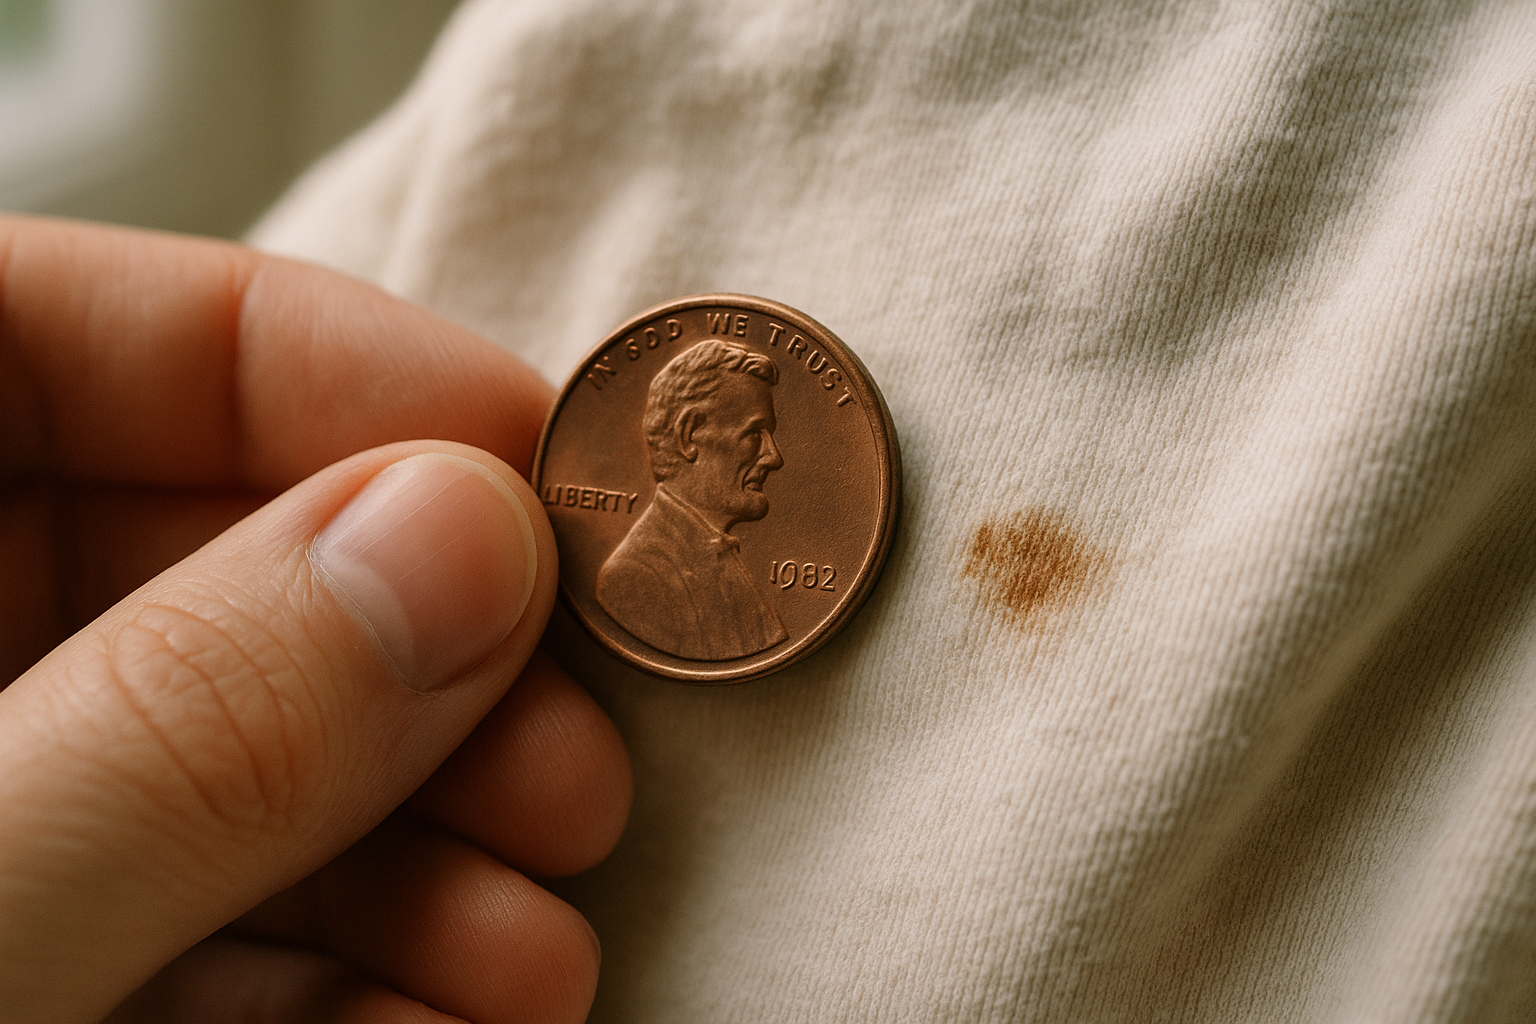
- Include one photo with a coin, ruler, or your hand next to any hole, stain, or tear so the buyer can judge real scale. "Small stain" means nothing without a size reference.
- Photograph tags, care labels, and any RN number close-up — buyers checking authenticity or size accuracy look here, and it removes another category of dispute entirely.
- Review the full set before uploading: if you wrote "light pilling" in the description, there should be a photo of that exact pilling. Every claim in your text needs a photo receipt.
A note on grading tiers and what they mean for your photo count
The number of defect photos you need scales with condition tier. An item that qualifies as NWT (new with tags) or NWOT (new without tags) typically needs zero defect shots — just proof of the tag. An item graded Excellent might need one or two close-ups confirming it's genuinely close to new. By the time you're listing something as Good, Fair, or Poor, you should have three or more defect shots, because that's where buyer expectations and actual condition are most likely to diverge — and where disputes cluster.
How to shoot each defect type: distance, light, and what to include
Different defects need different camera setups. A stain photographed from two feet away just looks like a shadow. A hole photographed too close loses the fabric context around it. Use this as a quick reference.
| Defect type | Camera distance | Lighting | Include in frame |
|---|---|---|---|
| Pilling | 4-6 inches, angled slightly to catch texture | Raking light (side angle), not straight-on flash | Enough surrounding fabric to show it's localized (e.g., underarm only) |
| Stains / discoloration | 8-10 inches, straight-on | Diffused daylight, flash off to avoid glare hiding the mark | A coin or your finger for scale |
| Holes / tears | 6-8 inches | Backlit if possible (hold fabric up to light) to show if it's a full hole or just thinning | Ruler or coin for size, plus one wider shot for location context |
| Loose stitching / seam splits | 4-6 inches | Direct light along the seam line | Both sides of the seam if it affects structural integrity |
| Broken zipper/button/snap | 6-8 inches | Even light, no shadow across the mechanism | The part in both closed and open/failed position |
| Fading / sun-bleaching | Full garment shot plus one close-up | Natural daylight shows true color shift best | An unfaded area of the same garment for contrast |
| Odor evidence (pit stains, storage yellowing) | 6-8 inches | Diffused, flash off | The full underarm or waistband area, not just the darkest spot |
Common mistakes that still trigger returns
Even sellers who take defect photos get returns because of how they take them. Watch for these:
- Shooting defects only in the description gallery, not the main photo carousel. Buyers on mobile often don't scroll past photo four. If the defect matters, it belongs in the first six images.
- Using flash on stains. Direct flash bounces off fabric and can wash out exactly the mark you're trying to prove exists. Natural or diffused light shows true color and texture.
- No scale reference. "Small stain, barely noticeable" next to a photo with nothing to compare size against leaves the buyer to guess — and guesses skew toward disappointment.
- Photographing the defect after cleaning it up. If you spot-treated a stain and it's mostly gone, the photo should reflect the item as it will ship, not a best-case version.
- Skipping functional element photos because the flaw is intermittent. A zipper that catches sometimes still needs disclosure and, ideally, a photo showing exactly where it catches.
- Treating odor as unphotographable and therefore skippable. You can't shoot a smell, but you can shoot the yellowing, the shine, or the fabric change that usually comes with it — and you should still write a plain sentence about it.
Where this fits in your listing workflow
Defect photography only works if it happens at the same point every time — not when you remember, not only for the expensive items. Build it into intake, before the item ever gets bagged or binned. That's the same principle behind the intake photo system we've written about for inventory tracking: one consistent capture point beats sporadic effort.
The math on this is simple. Say you list 200 items a month and 8% come back as "not as described" — a reasonable number if you're inconsistent about defect shots. At an average item value of $28, that's roughly $448 a month in returned inventory, plus the shipping both ways and the time to relist. Cut that return rate to 3% with consistent defect photography and clear disclosure, and you've recovered most of that margin without changing what you source or how you price.
This is also exactly the gap that standardized condition grading closes. When a garment carries a numerical grade backed by a documented condition report across all five factors, the buyer isn't relying on your adjective choice or your photo instincts that day — they're looking at evidence collected the same way every time. Fewer disputes, less back-and-forth, and a defensible record if a claim does come in.
Try it on your next batch
Before your next listing session, run one item through the checklist above and grade it through FlipDesk. You'll get a structured condition report across Fabric Condition, Structural Integrity, Cosmetic Appearance, Functional Elements, and Odor & Cleanliness, plus a defect shot list matched to what the grade actually requires — so you're not guessing which close-ups to take or skipping the ones that matter most.